Surely you've already faced a situation that the picture you took had an unnatural color cast. It can be, for example, a color tuning to blue or orange, but in any case it is an unnatural color appearance. How could it have happened?
Lighting conditions
The lighting conditions when taking a picture may vary and they are mainly affected by the light source. The object looks different in direct sunlight, otherwise in cloudy skies. And in a completely different way, colors look under artificial lighting from street lamps. The human eye can adapt quite well to different lighting conditions and sees white even under artificial lighting. Camera chips do not have this capability. Thus, the color cast of the object in the image is significantly affected by the light source. How to eliminate this error, which is called unbalanced white balance?
White balance setting when shooting
A basic white balance setting can be made already when the picture is taken. Even the cheapest cameras have the option of setting an automatic white balance control according to the current lighting conditions. Mostly these are settings using pictograms of the sun, clouds or light bulbs. However, this is only a very rough setting. If you are shooting in raw format, you do not have to deal with this setting too much and everything can be set correctly during photo editing later on.
White balance in photo editor
When editing an image, it is important to perform white balance as the first step, at the beginning of color or brightness adjustments. It´s difficult to edit An unbalanced image and in its final form it will not look natural.
Currently, each photo editor allows white balance correction. For this purpose, editors often use an eyedropper to select a white or gray dot on the image and let the editor make the adjustment. What will the editor do? At first glance, a simple operation. For the selected point sets all 3 color channels R, G and B to the same level. If the selected point is very bright, we get almost white at that point. In other cases we get a certain level of gray
Manual setting of white balance
Unfortunately, the above described procedure does not always work properly and sometimes your image looks unnatural even after automatic white-balancing. Also, your image may not contain any white or gray areas. In this case, the following manual setting worked better for me.
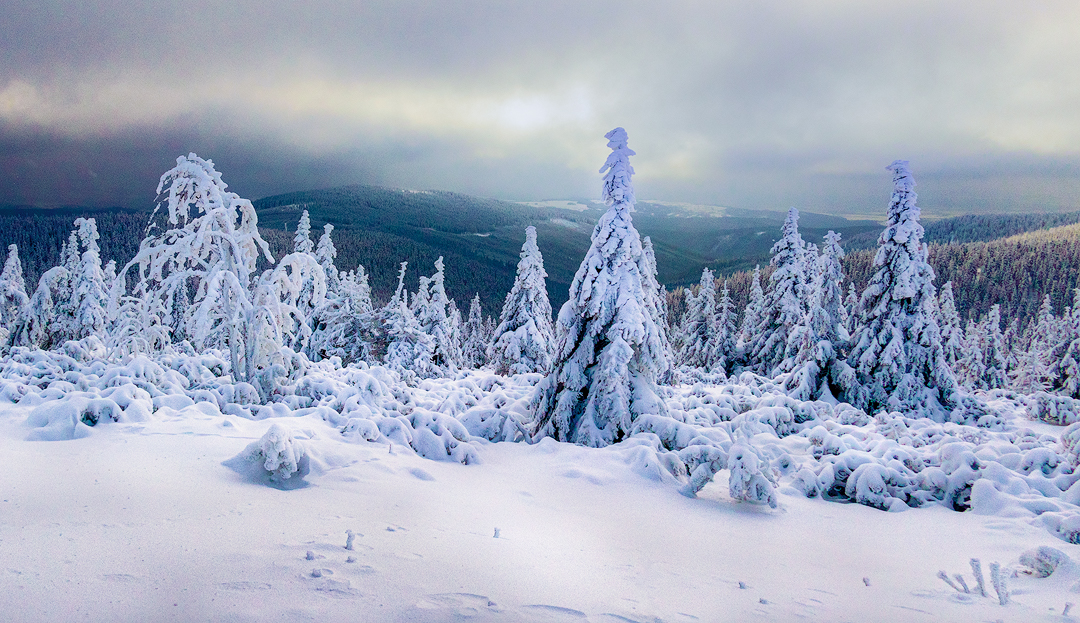
- I will increase in editor Saturation and Vibrance of the image to 100%. Yes, the image looks very unnatural, but I can clearly see the color shift caused by the lighting conditions when it was taken. In this case, the image is shifted significantly to blue.
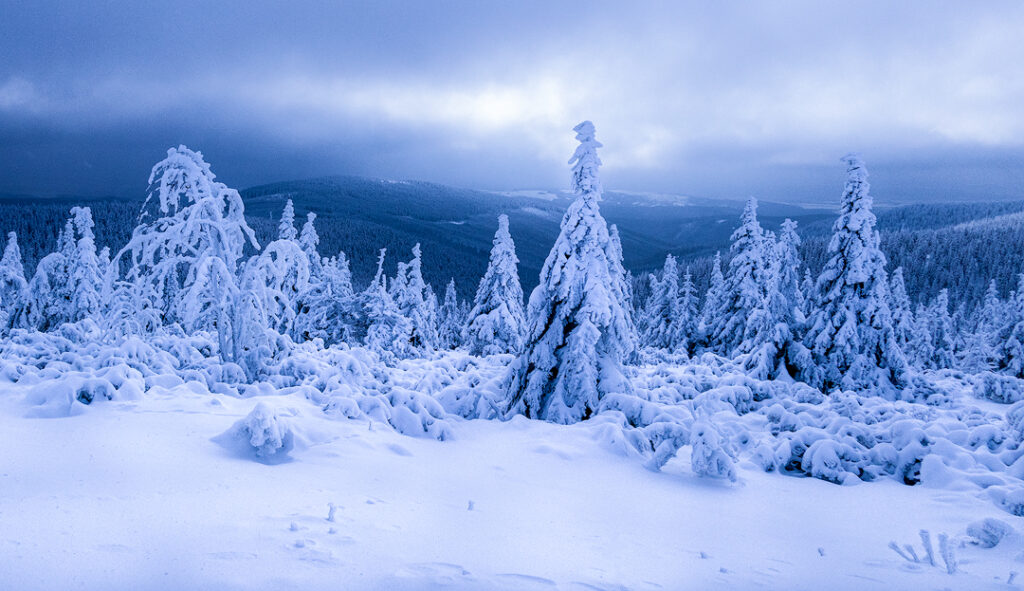
2. Use the Temp slider to find the optimal position where the image will be neither too blue nor too yellow.
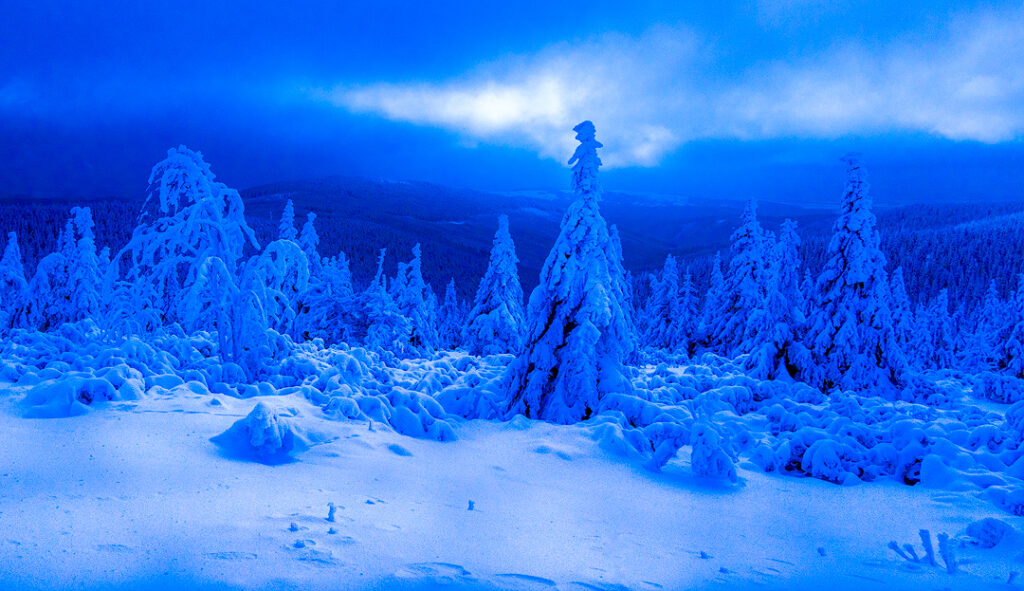
3. Similarly, using the Tint slider, I look for the optimal position where the image will be neither too green nor too magenta.

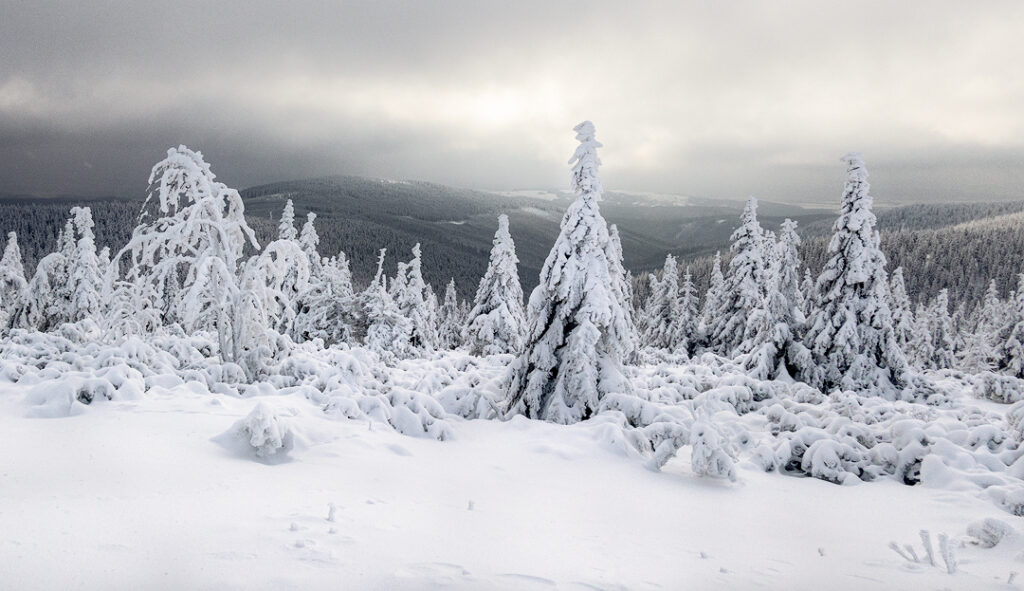
4. I set Saturation and Vibrance sliders back to their original values. I will get a color-neutral image. Next, I will continue with further adjustments.
The basic prerequisite for successful implementation of this method is adjusting the white balance on a properly calibrated monitor.
The described method is fast and applicable in almost all editing programs. At the same time, while adjusting vibrance and saturation, you will get an idea of what color tones your image contains.