Autumn brings wonderful colors and morning mists often evoke a very romantic atmosphere. Ideal conditions for photography in the forest, which will allow you to create a fairytale mysterious mood in photography. In the following post, I will provide some tips to help you capture these extraordinary moments in your photos.
1. Select a lens with a longer focal length
The photo should lead the viewer into the picture. By selecting a focal length of around 100-150 mm, the depth of the image is visually reduced and the view width is narrowed. The viewer is thus optically drawn into the image and naturally focuses on the main subject. Under summer conditions, however, we would get a very flat image in this way. However, thanks to the fog, which hides more trees farther from the lens, we will create a pleasing depth of the image for the viewer.
2. Find an attractive composition
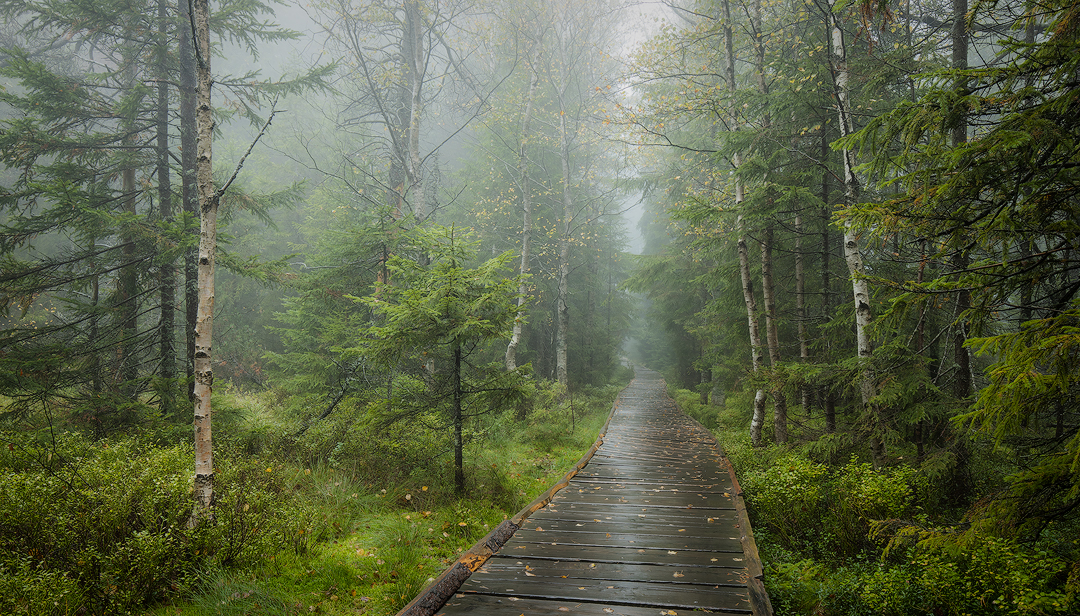
Discovering an attractive composition is probably the most difficult task when shooting in the woods. The forest is usually very disorganized, everything is randomly distributed, so finding an eye-catching composition is not easy. Try to frame the image in some way. The underside can be framed by fallen leaves, ferns or a broken tree. On the sides, you can use more prominent trees or the edge of the rock for framing. Using a forest path or one-way oriented tree branches can help a lot to create guiding lines for pleasing composition. Try to find repetitions of certain patterns that will lead the viewer's eyes to the main subject of the image.
Don´t fix to the first composition found. The forest is so diverse that you will certainly find a number of other interesting views. Try it. Take one step forward, two steps to the side. Experiment. And mainly, have a fun.
3. Guide the viewer using contrast
It is usually a bit easier to guide the viewer's attention with the help of contrast in photography. If the edges of the image are blurred, captured in darker gray colors, and the subject is more pronounced in color and contrast, you will naturally lead the viewer to the main subject of your image. The distinctive and sharp texture visible on the subject's motif, as opposed to the soft texture of the objects around it, also reliably catches the eyes of the viewer. Similarly, you can use the contrast between cold and warm colors.
4. Benefit from the use of fog
When shooting in the forest, a fog adds a number of elements to the scene, which will allow you to create a more interesting and engaging photo. As I mentioned in the first point, the fog will help us to create the necessary depth of the image. This third dimension adds plasticity to the whole scene. The fog also creates the much-desired natural contrast between the subject's motif and its background. Often fog will help obscure distracting elements of the image. The fog can make visible the sun's rays entering your photo. And last but not least, the natural wet shine remains in the places where the fog rose. This is adding another interesting element of the image.
5. Skip the sky
During the fog in the forest, the sky is not visible anyway, so do not insert it into the image. The gray misty sky will not bring any attractive element to the image, so just skip it. In addition, a viewer who does not see the sky in the picture naturally gets the feeling that he is inside the forest. Surrounded only by trees and fog. And that's exactly the feeling we want to share with this image.
6. Remove interfering elements from the image
This rule is valid for a good composition of each photo. However, I want to emphasize this intentionally here, because in the forest you will encounter an interfering element at almost every step. Therefore, carefully check what you have entered in the camera's viewfinder before pressing the shutter button.
7. Shoot in backlight
Thanks to the surrounding fog, it is possible to take photos against the light. This creates a naturally contrasting background, which is captured in very light tones and vague contours. The main motif, trees, on the other hand, acquire contrasting outlines in this way, and their surface has a distinctive texture that they would lose when shooting along the light.
8. Avoid windy weather
You will often take these forest pictures in the fog with longer exposition time. The lighting conditions are worse and you will use a larger aperture to create a greater depth of field. This way, you can only get well-exposed pictures by using a longer exposure time. You often do not avoid using a tripod. However, it is important that the branches and especially the leaves of the trees remain motionless for the duration of the exposure and are captured sharply in the image. If you feel a gust of wind, you should take the picture repeatedly so that you have a better chance of taking a picture without blurred branches. The time without wind will help also to keep the fog in the forest longer. When planning such a photographic trip, therefore, check not only the forecast of the occurrence of fog, but also the expected wind speed.
9. Enjoy the mood of woodland photography to the fullest
Unlike photographing sunrise or sunset, photographing trees in fog has the advantage that we are usually not pressed by time. The light conditions don´t change too fast and the trees don´t escape. The fog often lasts all morning. We can enjoy the fairytale mood in peace and fully. So enjoy it!